Cutting Black Nails on a Bernedoodle
One of the most common anxieties for Bernedoodle owners, especially those with darker-coated pups, is the daunting task of trimming those stubborn black nails. You want to keep your furry friend healthy and comfortable, but the fear of cutting too far and hitting the quick, causing pain and bleeding, can make nail trims feel like a high-stakes wrestling match. This comprehensive guide is here to demystify the process, offer practical tips, and build your confidence in safely and effectively cutting your Bernedoodle’s black nails at home.
Why Black Nails Are Such a Challenge on a Bernedoodle
Let's be honest, those beautiful, often dark, Bernedoodle nails are a real head-scratcher. Unlike dogs with clear or light-colored nails where you can often see the pink quick through the nail, black nails completely obscure this vital blood vessel and nerve. This isn't just a minor inconvenience; it's a significant source of stress for both you and your dog.
The "Quick" Dilemma: A Hidden Foe
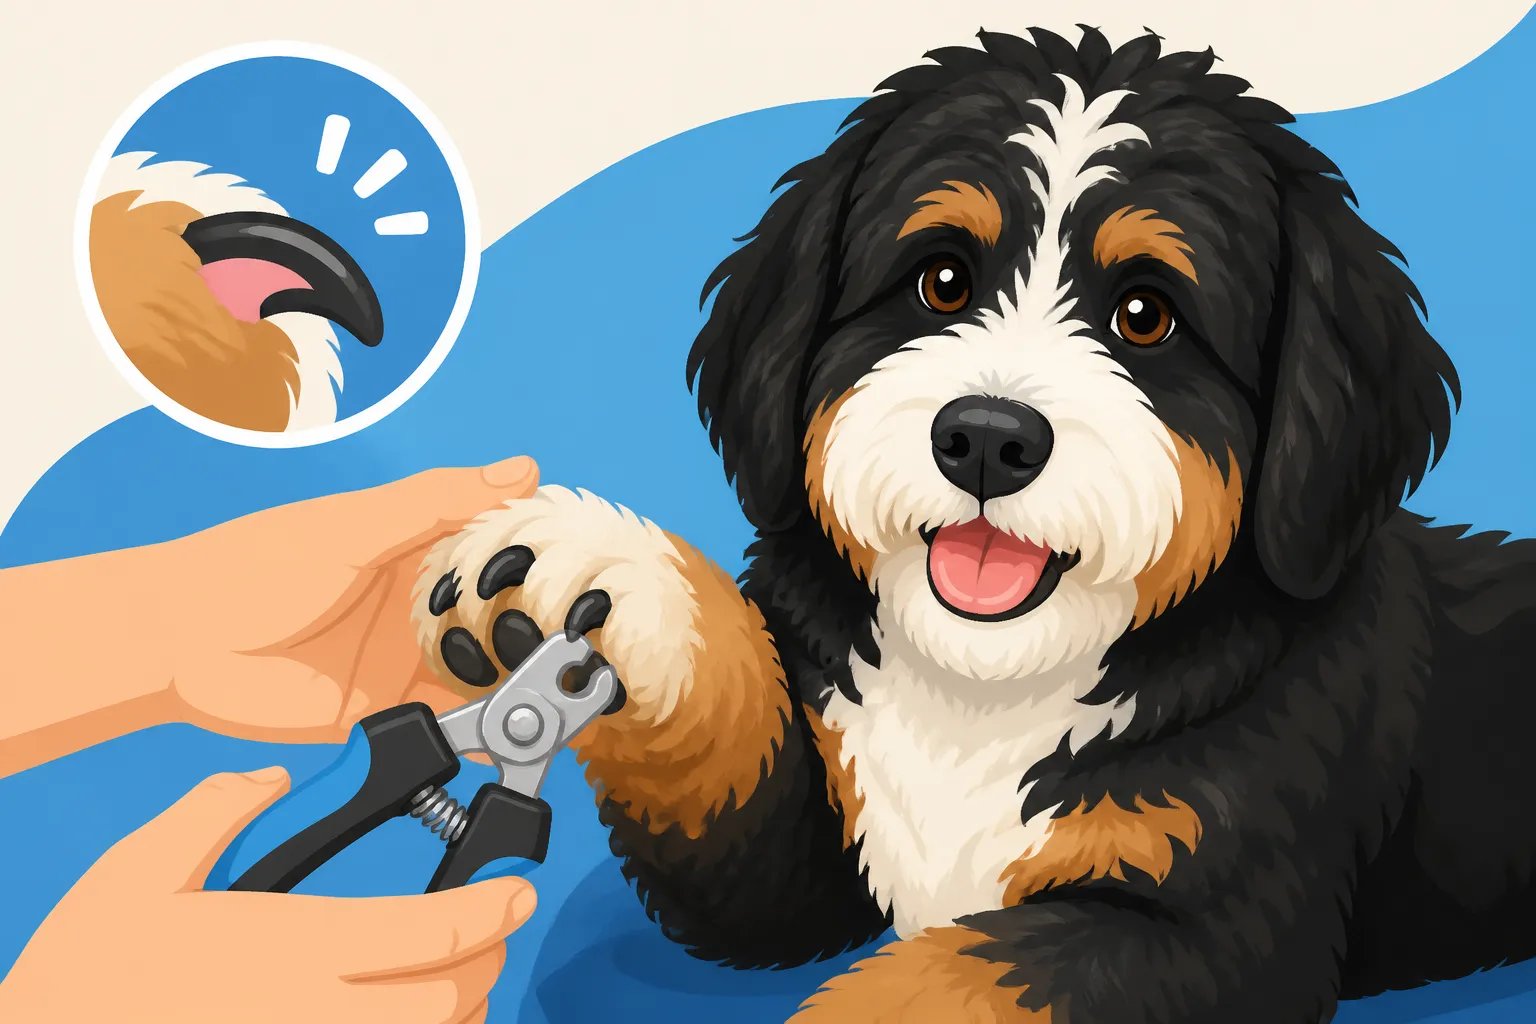
The quick is essentially the living part of your dog's nail, containing blood vessels and nerves. If you cut into it, it's painful, it bleeds, and it makes your Bernedoodle understandably wary of future nail trims. The problem with black nails is that the quick is invisible to the naked eye. You're essentially working blind, relying on educated guesses and small, conservative cuts. This isn't just a Bernedoodle issue, of course, but given the size and strength of many Bernedoodles, a painful experience can make future trims incredibly difficult to manage, especially if you have a standard Bernedoodle heading for ninety pounds.
Imagine trying to trim your own fingernails in the dark; that's what it feels like for us when facing those black nails. Many owners have had a bad experience, perhaps a quick nick on an excited puppy, and that memory lingers, making every subsequent attempt fraught with tension. Our Bernedoodles pick up on our stress, creating a vicious cycle where everyone involved feels anxious.
The Bernedoodle's Thick, Strong Nails
Bernedoodles, inheriting traits from both the sturdy Bernese Mountain Dog and the active Poodle, often have incredibly thick and strong nails. These aren't delicate little claws; they're built for digging, running, and holding their own. This means you can't just use flimsy clippers you might find for a smaller breed. You need robust tools that can handle the job, otherwise, you risk crushing the nail, which is uncomfortable for your dog and ineffective for you.
Their nails also tend to grow quickly, especially if your Bernedoodle doesn't get a lot of walks on rough surfaces like pavement or concrete that naturally wear them down. Overgrown nails can cause a host of problems, from splayed toes and discomfort when walking to potential orthopedic issues over time. They can even get caught and tear, leading to painful injuries. So, while cutting them is tough, it's absolutely crucial for their long-term health. Regularly maintaining those nails is part of What a Bernedoodle Needs Every Day.
Essential Tools for Tackling Black Nails
Having the right equipment is half the battle when it comes to successful Bernedoodle nail trims. Don't skimp here; investing in good quality tools will make the process safer, more efficient, and less stressful for both you and your dog. You wouldn't try to hammer a nail with a screwdriver, and you shouldn't try to trim thick Bernedoodle nails with subpar clippers.
Choosing the Right Clippers
There are two main types of clippers: scissor-style (often called "Guillotine" or "Resco" style) and plier-style. For a Bernedoodle, especially a larger one, plier-style clippers with a sharp, sturdy blade are usually the best choice. Brands like Safari or Millers Forge offer excellent, durable options that you can often find readily on Amazon or at your local pet supply store.
When selecting clippers:
- Sharpness: This is paramount. Dull clippers will crush the nail, causing pain and stress. If your clippers feel like they're tearing or splintering the nail, it's time for a new pair.
- Size: Ensure the clippers are appropriately sized for your Bernedoodle's thick nails. Small clippers won't get the job done cleanly and safely.
- Ergonomics: You'll be holding these, potentially for a while. Choose a pair that fits comfortably in your hand and offers a good grip.
- Safety Guard (Optional): Some clippers come with a safety guard to prevent you from cutting too much. While helpful for beginners, remember it's not foolproof, especially with black nails.
The Benefits of a Nail Grinder/Dremel
Many Bernedoodle owners find a nail grinder, often referred to as a Dremel, to be a game-changer for black nails. Instead of cutting, a grinder files the nail down slowly and smoothly. This incremental approach significantly reduces the risk of hitting the quick, as you're removing small layers at a time. It also smooths the edges, preventing sharp points that can scratch floors or people.
Consider these advantages of using a grinder:
- Reduced Quick Risk: By filing gradually, you can stop as soon as you see a small black dot appear in the center of the nail, indicating you're getting close to the quick.
- Smoother Finish: Grinders leave a much smoother nail edge compared to clippers, which can sometimes leave sharp points.
- Less Pressure: Some dogs dislike the sudden pressure and "snip" sensation of clippers. A grinder offers a continuous, vibrating sensation that some dogs tolerate better once accustomed to it.
- Comfort for Larger Dogs: For a heavy Bernedoodle with dense nails, a grinder can be less jarring than trying to exert the force needed with clippers.
You can find excellent cordless pet grinders on Chewy or Amazon, often with multiple speed settings and different sized grinding drums. The key is to introduce it slowly, making it a positive experience, which is crucial for Getting a Bernedoodle to Lie on Its Side or for accepting grooming tools in general.
Quick-Stop Powder and Other Must-Haves
Even with the utmost care, accidents can happen. Having quick-stop powder (also known as styptic powder) on hand is an absolute necessity. This powder contains agents that constrict blood vessels and stop bleeding quickly if you accidentally nick the quick. Don't start a nail trim without it!
Other useful items include:
- High-Value Treats: Crucial for positive reinforcement. Think small, delicious, and easy-to-eat pieces of cheese, cooked chicken, or store-bought soft training treats. Ollie or other fresh food companies often offer high-value options that dogs adore.
- Good Lighting: A well-lit area is vital. A headlamp or a small flashlight can be incredibly helpful for getting a closer look at those black nails.
- Non-Slip Mat: If you're grooming on a table or hard floor, a non-slip mat will help your Bernedoodle feel more secure and prevent slipping, reducing anxiety.
- A Grooming Table (Optional): For a large Bernedoodle, a grooming table can save your back and provide a dedicated, stable space for trims, similar to what's needed for Building a Bernedoodle Up to a Three Hour Groom.
Here's a quick comparison of popular nail trimming tools:
| Tool Type | Pros | Cons | Best For |
|---|---|---|---|
| Plier Clippers | Quick cutting, efficient for well-maintained nails | Risk of cutting quick, can leave sharp edges | Confident owners, dogs accustomed to clipping |
| Guillotine Clippers | Good for smaller to medium nails | Less control on very thick nails, can be tricky | Dogs with thinner nails |
| Nail Grinder | Low quick risk, smooth finish, gradual removal | Noise/vibration can scare some dogs, takes longer | Black nails, anxious dogs, maintaining length |
| Quick-Stop Powder | Essential for stopping accidental bleeding | Does not prevent quick hits, only remedies them | Every nail trim session |
Step-by-Step Guide to Trimming Your Bernedoodle's Black Nails
Now that you have your tools ready, let's walk through the actual process. Remember, patience and positive reinforcement are your best friends here. Don't rush, and always prioritize your Bernedoodle's comfort.
Preparation is Key
Before you even pick up the clippers or grinder, set the scene for success.
- Choose a Quiet Time and Place: Find a calm environment where both you and your Bernedoodle can relax without distractions. A well-lit room is crucial.
- Gather Your Supplies: Have everything within arm's reach: clippers or grinder, quick-stop powder, and plenty of high-value treats.
- Positive Association: Before you do anything, let your Bernedoodle sniff the tools. Give them a treat. Repeat this several times over a few days if your dog is particularly nervous. You want them to associate the sight and smell of the tools with good things. This is part of Getting a Bernedoodle Used to Having Its Feet Held.
- Position Your Bernedoodle: For larger Bernedoodles, having them lie down might be easiest. For smaller ones, sitting or standing on a table might work. Make sure they are comfortable and secure. A second person can be incredibly helpful to hold your Bernedoodle gently and provide distractions or treats.
The "Flashlight Trick" and Other Visual Cues
This is where the magic happens for black nails! While you can't see the quick through the nail, you can sometimes get an idea of where it ends.
- The Flashlight Trick: Use a small, bright flashlight (like one on your phone) and shine it directly underneath the black nail, facing up. For some Bernedoodles, particularly those with nails that aren't jet black, you might be able to see a faint pinkish shadow indicating the quick's location. This isn't always foolproof, but it can give you a better estimate than just guessing.
- Looking for the "Dust Bunny": As you take tiny slivers off the end of the nail, especially with a grinder, look for the cross-section of the nail. The very tip will be dry and flaky. As you get closer to the quick, you'll see a small, darker, solid circle (sometimes referred to as a "dust bunny" or "bullseye") appear in the center of the cut surface. This means STOP! You are right at the quick. With clippers, you won't see this as clearly, which is why a grinder is often preferred for black nails.
- The Feel of the Nail: As you get closer to the quick, the nail might feel slightly softer or "rubbery" when you make a cut, compared to the hard, dry tip. This is a subtle cue but can be helpful with experience.
Taking Small Nips (or Grinds)
The golden rule for black nails is: little and often. You want to take off only the very tip, a tiny sliver at a time.
- Clippers: Hold your Bernedoodle's paw firmly but gently. Isolate one toe and hold the clipper perpendicular to the nail. Aim to cut just the hook-shaped tip. Make small, swift cuts. After each cut, give a treat and praise.
- Grinder: Turn the grinder on low speed first. Touch the tip of the nail to the grinding drum for just a second or two, then pull away. Check the nail. Repeat, slowly rounding the tip. Always keep the grinder moving slightly to avoid heating up the nail too much, which can be uncomfortable. Again, positive reinforcement after each successful short grind.
Focus on maintaining the natural angle of the nail, preventing it from touching the ground when your Bernedoodle is standing. Remember, consistent, short sessions are far better than trying to do too much at once and creating a negative experience. This ties into the advice in The Weekly Hours a Standard Bernedoodle's Coat Takes – it's about routine maintenance.
When to Stop
Knowing when to stop is the trickiest part with black nails.
- With Clippers: As mentioned, you're looking for that "dust bunny" cross-section. If you see it, you're done with that nail. If you don't see it, but you've taken off the curved tip and the nail no longer touches the ground when your Bernedoodle stands, it's often best to err on the side of caution and stop there for the day. You can always trim more in a few days.
- With a Grinder: This is where the grinder shines. As you grind, you'll see layers of the nail being removed. The core of the nail will typically appear as a dark, solid circle when you're getting close to the quick. Once you see that distinct dark center, stop. You've reached the point just before the sensitive quick.
- The "Ground Test": A good rule of thumb for any nail trimming: when your Bernedoodle is standing naturally on a flat, hard surface, their nails should not touch the ground. If they click-clack on the floor, they're too long.
Making Nail Trims a Positive Experience for Your Bernedoodle
Nail trimming doesn't have to be a battle. With patience, consistency, and positive reinforcement, you can teach your Bernedoodle to tolerate, or even enjoy, the process. This builds trust and makes future sessions much easier.
Early Introduction and Desensitization
Start early, especially with a Bernedoodle puppy. Even before they need their first real trim, begin handling their paws regularly. Gently touch their toes, press on their paw pads, and pretend to clip their nails (without actually doing it). Pair this with enthusiastic praise and high-value treats.
- Puppy Phase: When your Bernedoodle is a puppy, touch their feet every day. Mimic holding clippers near their paws, turning on the grinder for a second (away from their paw), and immediately rewarding them. This desensitization is key to preventing lifelong fear. Think about it like Socializing a Bernedoodle Before Twelve Weeks – early positive exposure makes a huge difference.
- Gradual Exposure: Don't try to do all four paws, or even all nails on one paw, in a single session, especially at first. Aim for one or two nails, then stop and praise. Gradually increase the number of nails you do as your Bernedoodle becomes more comfortable.
- Consistency: Try to incorporate paw handling and brief nail attention into your daily routine. This keeps it from becoming a big, scary event that only happens once every few weeks.
Rewards and Praise
This is non-negotiable. Every step of the process – from letting you hold their paw to tolerating a snip or grind – should be met with sincere praise and a delicious treat.
- High-Value Rewards: Reserve special treats just for nail trims. This makes the experience more appealing.
- Verbal Praise: Use a happy, calm tone of voice. "Good boy!" or "Good girl!" goes a long way.
- Breaks: If your Bernedoodle seems stressed, take a break. Don't force them to continue if they're actively struggling. A short pause can reset the mood.
- Ending on a Positive Note: Always try to end the session on a positive note, even if you only managed one nail. You want your Bernedoodle to walk away with a good feeling about the experience.
Enlisting Professional Help
It's okay to admit you need help! Professional groomers are experts at handling nervous dogs and can often get the job done efficiently. They also have specialized equipment and techniques.
- Groomer Visits: Regular trips to the groomer, even just for nail trims between full grooming sessions, can maintain your Bernedoodle's comfort with the process. They can show you techniques or help keep nails at an optimal length. The Seventy to Hundred Fifty Dollar Bernedoodle Groom often includes nail trims.
- Vet Technicians: Many veterinary clinics offer nail trimming services, and their technicians are often very skilled and patient.
- Training Classes: Some dog training facilities offer workshops specifically on cooperative care, which can include nail trimming techniques.
Sometimes, the best thing you can do for your Bernedoodle (and your sanity) is to delegate this task to a professional. There's no shame in it!
What to Do If You Nick the Quick
It happens to the best of us, especially with black nails. Don't panic. Staying calm is the most important thing you can do for your Bernedoodle in this situation.
Don't Panic
First, take a deep breath. Your Bernedoodle might yelp and pull away, but your calm demeanor will help them recover faster. Panicking will only escalate their fear.
- Reassure Your Dog: Speak in a calm, soothing voice. Offer comfort and gentle strokes.
- Assess the Bleeding: A quicked nail will bleed, sometimes quite a bit, and it can look alarming. However, it usually stops relatively quickly with proper intervention.
Applying Styptic Powder
This is why having quick-stop powder (styptic powder) readily available is crucial.
- Open the Container: Have it open and ready before you even start trimming.
- Apply Firm Pressure: Take a pinch of the powder and apply it directly to the bleeding nail tip. Press firmly for about 15-30 seconds.
- Check for Bleeding: Release the pressure and check if the bleeding has stopped. If not, reapply the powder and hold firm pressure again. You might need to do this a couple of times.
- Cornstarch Alternative: If you don't have styptic powder, cornstarch or flour can work in a pinch. They won't stop the bleeding as quickly, but they can help it clot.
- Distract and Reward: Once the bleeding has stopped, offer your Bernedoodle a high-value treat and some calm praise. Try to end the session there for the day, or at least take a good break. Don't try to continue trimming immediately.
When to See a Vet
Most quicked nails can be managed at home with styptic powder. However, there are a few situations where veterinary attention is warranted:
- Excessive or Uncontrolled Bleeding: If the bleeding is heavy and doesn't stop after several applications of styptic powder and firm pressure, it's time to call your vet.
- Deep Laceration: If you've done more than just nick the quick and have caused a significant laceration to the toe itself, a vet visit is needed to assess the wound and prevent infection.
- Signs of Infection: In the days following a quicked nail, keep an eye on the toe. If you notice swelling, redness, pus, or if your Bernedoodle is limping or licking the paw excessively, seek veterinary advice.
- Severe Anxiety: If your Bernedoodle develops an extreme phobia of nail trims after a quicking incident, your vet might be able to offer sedatives for future trims or recommend specialized behavioral training to help overcome the fear.
Remember, consistent, small trims are key to keeping those black nails healthy and manageable. It might take time and practice, but with the right tools and a gentle approach, you and your Bernedoodle can conquer the fear of the quick together!
Disclaimer
This article is for general informational purposes only and does not constitute professional advice. Laws, prices and regulations vary by location and change over time. Consult a qualified professional for guidance on your specific situation.